> ## Documentation Index
> Fetch the complete documentation index at: https://docs.getpimento.com/llms.txt
> Use this file to discover all available pages before exploring further.

# Warehouse client packaging

***

## title: Client Packaging Setup Instructions

Note: Packaging must be created first before following these steps. Refere to the **Warehouse Packaging** doc for instructions on creating packaging.

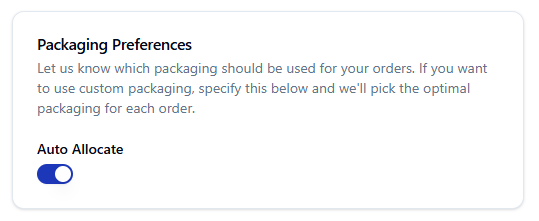
**How to turn on/off auto packaging allocation**

1. Navigate to the "Clients" tab

<img src="https://mintcdn.com/hutchlogistics/9YK_ZCjlgxAkEakE/images/packaging-8.png?fit=max&auto=format&n=9YK_ZCjlgxAkEakE&q=85&s=88dfb95b9e79899a7f78e6175862c577" width="255" height="30" data-path="images/packaging-8.png" />

2. Select the desired client

3. Navigate to the "Settings" tab then "Packaging"

<img src="https://mintcdn.com/hutchlogistics/9YK_ZCjlgxAkEakE/images/packaging-9.png?fit=max&auto=format&n=9YK_ZCjlgxAkEakE&q=85&s=ee5af29415d330330606aef8af4616d7" width="250" height="27" data-path="images/packaging-9.png" />

<img src="https://mintcdn.com/hutchlogistics/9YK_ZCjlgxAkEakE/images/packaging-10.png?fit=max&auto=format&n=9YK_ZCjlgxAkEakE&q=85&s=69caf343a91abf0de8d29ab7711a6eaa" width="843" height="105" data-path="images/packaging-10.png" />

4.Turn "Auto Allocate" on or off

* Please note auto allocation will be on by default

<img src="https://mintcdn.com/hutchlogistics/9YK_ZCjlgxAkEakE/images/packaging-11.png?fit=max&auto=format&n=9YK_ZCjlgxAkEakE&q=85&s=c1ebe554674bde8a7ad52d63d517c4f7" width="539" height="221" data-path="images/packaging-11.png" />

**How to configure packaging per client**

1. Navigate to the "Clients" tab

<img src="https://mintcdn.com/hutchlogistics/9YK_ZCjlgxAkEakE/images/packaging-8.png?fit=max&auto=format&n=9YK_ZCjlgxAkEakE&q=85&s=88dfb95b9e79899a7f78e6175862c577" width="255" height="30" data-path="images/packaging-8.png" />

2. Select the desired client and click "Log In"

<img src="https://mintcdn.com/hutchlogistics/v_Lqg7J-PbygkUOh/images/creatingclient-3.png?fit=max&auto=format&n=v_Lqg7J-PbygkUOh&q=85&s=43286f23fb147b300f90446751c6e8a2" width="73" height="81" data-path="images/creatingclient-3.png" />

3. Navigate to the "Inventory" tab then "Packaging"

<img src="https://mintcdn.com/hutchlogistics/9YK_ZCjlgxAkEakE/images/packaging-12.png?fit=max&auto=format&n=9YK_ZCjlgxAkEakE&q=85&s=d832c9a2a62073c178b23aa4a884bb34" width="266" height="35" data-path="images/packaging-12.png" />

<img src="https://mintcdn.com/hutchlogistics/9YK_ZCjlgxAkEakE/images/packaging-13.png?fit=max&auto=format&n=9YK_ZCjlgxAkEakE&q=85&s=8e30921591cb4247a53da1074afa461e" width="308" height="109" data-path="images/packaging-13.png" />

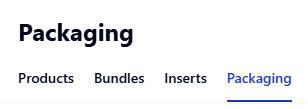
4. You can configure the packaging as needed

<img src="https://mintlify.s3.us-west-1.amazonaws.com/hutchlogistics/images/packaging-14.png" />
